一、写在开始
又到了该更插件系列文章的时候了,接下来我会专注于更新插件内部 API 的使用,并结合实际场景实践一些简单易学的应用,来说明这些 API 的作用,主要的目的是为了当今后如果读者朋友们有类似的业务场景,可以直接联想起来,甚至可以直接使用。如果您也对插件开发感兴趣,请关注我,或者关注我的插件系列专栏;
二、本文说明
chrome 插件开发的过程中,有许许多多的 API 需要我们掌握,但是实际上如果只是考虑到用户交互最重要的功能,我们最应该掌握的是关于 action 的应用,本文就尝试探讨 acion 相关 API 的用法,并结合实践做一个小功能以便更好的将其掌握。
概念:
所谓 action 实际上就是 tab 栏右侧的图标,当我们点击图标的时候会出现一些反应,并且这个图标上也可能会有某种提示或是显示,而这所有的交互的集合实际上就是 action。
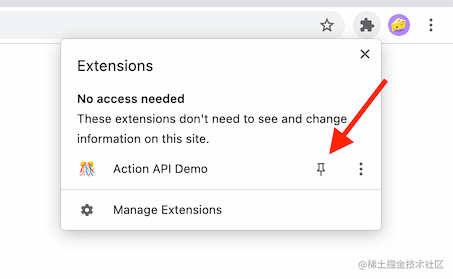
为了更好的将 acionAPI 的效果展现,建议将插件定在 tab 上,这样才能看到具体的效果!就像下面这样:
下面的案例在文末都会有代码,接下来就开始吧!
三、小试牛刀
搭建初始化插件:
创建如下的结构
// manifest.json
{
  "name": "action demo",
  "description": "action demo",
  "version": "1.0",
  "manifest_version": 3,
  "action": {
    "default_popup": "popup.html",
    "default_icon": {
      "16": "/images/get_started16.png",
      "32": "/images/get_started32.png",
      "48": "/images/get_started48.png",
      "128": "/images/get_started128.png"
    }
  },
  "icons": {
    "16": "/images/get_started16.png",
    "32": "/images/get_started32.png",
    "48": "/images/get_started48.png",
    "128": "/images/get_started128.png"
  }
}
同级目录下创建 popup.html
<!DOCTYPE html>
<html lang="en">
  <head>
    <meta charset="UTF-8" />
    <meta http-equiv="X-UA-Compatible" content="IE=edge" />
    <meta name="viewport" content="width=device-width, initial-scale=1.0" />
    <title>Document</title>
  </head>
  <body>
    <div>
      <button id="print-chrome">打印chrome</button>
    </div>

    <script src="./popup.js"></script>
  </body>
</html>
同级目录下创建 popup.js
const printChromeBtn = document.getElementById("print-chrome");

printChromeBtn.addEventListener("click", () => {
  console.log(chrome);
});
温馨提示
1.在插件中几乎所有的 HTML 页面默认情况下都不允许采用内联脚本的形式,否则会报下面这个错误2.提前将图片准备好,如果没准备好,在这里下载也可以
然后直接加载进浏览器运行插件。如果看过我之前的文章,那么这一步应该是轻车熟路的,然后点击图标会弹出 popup.html,点击打印 chrome 按钮,就会在 popup.html 对应的控制台,出现 chrome 这个对象,这个对象身上有 action 这个属性,这个属性的属性值暴露了我们可以调用的关于 action 的所有 API:
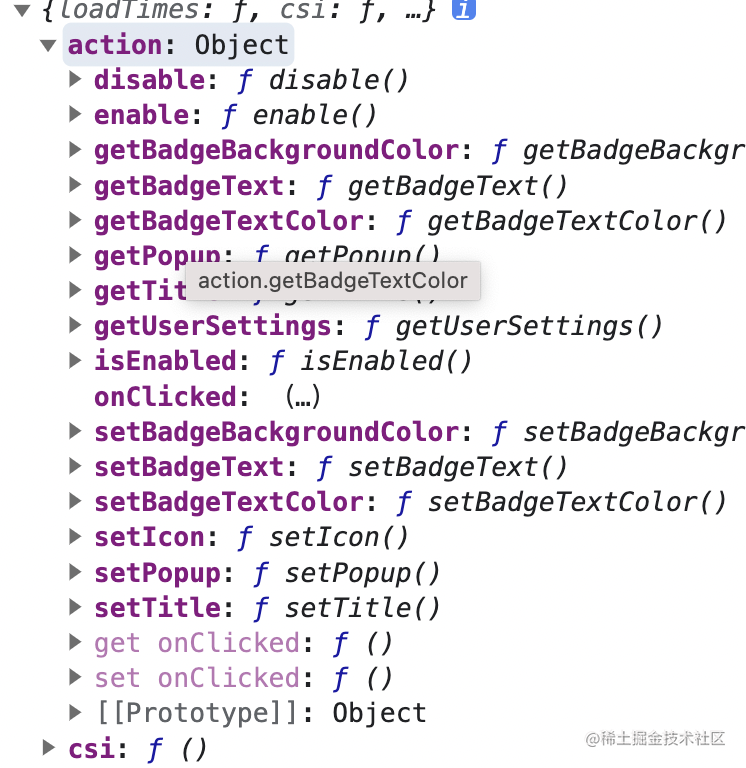
把他们列出来一下并附上对应的说明:
- disable() —— 禁用 action
- enable() —— 启用 action
- getBadgeBackgroundColor() —— 获取徽章的背景颜色
- getBadgeText() —— 获取徽章的文字
- getBadgeTextColor() —— 获取徽章的文字颜色
- getPopup() —— 获取当前 popup 实例
- getTitle() —— 获取鼠标 hover 在图标上时显示的文字
- getUserSettings() —— 获取用户设置
- isEnabled() —— 当前 action 是否未禁用
- onClicked —— 点击 action 的事件监听
- setBadgeBackgroundColor() —— 设置徽章背景颜色
- setBadgeText() —— 设置徽章文字
- setBadgeTextColor() —— 设置徽章文字颜色
- setIcon() —— 设置 action 的图标
- setPopup() —— 设置 popup 实例
- setTitle() —— 设置鼠标 hover 在图标上时显示的文字
我们在脚本加载的时候新创建一个 tab 来演示这些 API 的作用,以便更好的看到相应的效果!
// popup.html中添加 + <button id="create-demo">创建新的tab</button>// popup.js中添加下面的逻辑
const createDemoBtn = document.getElementById("create-demo");
createDemoBtn.addEventListener("click", () => {
// 事件触发后会创建一个新的html
chrome.tabs.create({
url: "demo.html",
});
});准备下面的 demo.html
<!DOCTYPE html>
<html lang="en">
  <head>
    <meta charset="UTF-8" />
    <meta http-equiv="X-UA-Compatible" content="IE=edge" />
    <meta name="viewport" content="width=device-width, initial-scale=1.0" />
    <title>Document</title>

    <!--
      disable()
      enable()
      getBadgeBackgroundColor()
      getBadgeText()
      getBadgeTextColor()
      getPopup()
      getTitle()
      getUserSettings()
      isEnabled()
      onClicked
      setBadgeBackgroundColor()
      setBadgeText()
      setBadgeTextColor()
      setIcon()
      setPopup()
      setTitle()
    -->
  </head>
  <body>
    <div>
      <h4>通过下面的图标来禁用或是启用action</h4>
      <button id="toggle-btn">禁用/允许</button>
    </div>
    <div>
      <h4>通过下面的操作来操控显示的Popup实例</h4>
      <select id="popup-options">
        <option value="/popup.html">默认</option>
        <option value="/popups/a.html">A</option>
        <option value="/popups/b.html">B</option>
        <option value="">点击事件</option>
      </select>

      <label>
        <span>当前的popup:</span>
        <input
          type="text"
          style="width: 400px"
          id="current-popup-value"
          disabled
        />
      </label>
    </div>
    <div>
      <h4>徽章就是浮在action图标上的一个高亮的文字,可以用来表示状态</h4>
      <label>
        <input type="text" id="badge-text-input" />
        <button id="set-badge">设置badge</button>
      </label>

      <h5>当前badge的文字:<span id="current-badge-text"></span></h5>

      <button id="set-badge-bg-color">设置徽章背景颜色</button>
      <button id="set-badge-text-color">设置徽章字体颜色</button>

      <h5>
        当前badge的背景颜色
        <span id="current-badge-bg-color"></span>
      </h5>

      <h5>
        当前badge的字体颜色
        <span id="current-badge-text-color"></span>
      </h5>
    </div>

    <div>
      <h4>动态设置action图标</h4>
      <button id="set-icon-button">设置图标</button>
    </div>

    <div>
      <h4>设置hover时显示的文字</h4>
      <label>
        <input type="text" id="title-text-input" />
        <button id="set-title">设置title</button>
      </label>

      <h5>
        当前的title
        <span id="current-title"></span>
      </h5>
    </div>

    <script src="./demo.js"></script>
  </body>
</html>
下面是 demo.js
//disable和enable API
const toggleBtn = document.getElementById("toggle-btn");

toggleBtn.addEventListener("click", () => {
  chrome.action.isEnabled().then((state) => {
    state ? chrome.action.disable() : chrome.action.enable();
  });
});

//setPopup API
document
  .getElementById("popup-options")
  .addEventListener("change", async (event) => {
    let popup = event.target.value;
    await chrome.action.setPopup({ popup });

    // Show the updated popup path
    await getCurrentPopup();
  });

async function getCurrentPopup() {
  let popup = await chrome.action.getPopup({});
  document.getElementById("current-popup-value").value = popup;
  return popup;
}

chrome.action.onClicked.addListener((tab) => {
  alert("这是一个事件");
});

//setBadgeText和getBadgeText API
async function showBadgeText() {
  let text = await chrome.action.getBadgeText({});
  document.getElementById("current-badge-text").value = text;
}

document.getElementById("set-badge").addEventListener("click", async () => {
  const text = document.getElementById("badge-text-input").value;
  await chrome.action.setBadgeText({ text });
  showBadgeText();
});

const random = () => Math.floor(Math.random() * 256);

async function showBadgeColor() {
  let color = await chrome.action.getBadgeBackgroundColor({});
  document.getElementById("current-badge-bg-color").innerText = JSON.stringify(
    color,
    null,
    0
  );
}

async function showBadgeTextColor() {
  let color = await chrome.action.getBadgeTextColor({});
  document.getElementById("current-badge-text-color").innerText =
    JSON.stringify(color, null, 0);
}

document
  .getElementById("set-badge-bg-color")
  .addEventListener("click", async () => {
    chrome.action.setBadgeBackgroundColor({
      color: [random(), random(), random(), 255],
    });
    showBadgeColor();
  });

document
  .getElementById("set-badge-text-color")
  .addEventListener("click", async () => {
    chrome.action.setBadgeTextColor({
      color: [random(), random(), random(), 255],
    });
    showBadgeTextColor();
  });

// setBadgeText 和 getBadgeText API
const EMOJI = ["confetti", "suit", "bow", "dog", "skull", "yoyo", "cat"];

let lastIconIndex = 0;
document
  .getElementById("set-icon-button")
  .addEventListener("click", async () => {
    chrome.action.setBadgeText({ text: "" });
    let index = lastIconIndex;
    index = Math.floor(Math.random() * EMOJI.length);
    if (index === lastIconIndex) {
      index = (index + 1) % EMOJI.length;
    }
    let emojiFile = `images/emoji-${EMOJI[index]}.png`;
    lastIconIndex = index;

    // 这个地方是将本地的资源转为imageData的过程;

    let response = await fetch(chrome.runtime.getURL(emojiFile));
    let blob = await response.blob();
    let imageBitmap = await createImageBitmap(blob);
    let osc = new OffscreenCanvas(imageBitmap.width, imageBitmap.height);
    let ctx = osc.getContext("2d");
    ctx.drawImage(imageBitmap, 0, 0);
    let imageData = ctx.getImageData(0, 0, osc.width, osc.height);

    chrome.action.setIcon({ imageData });
  });

document.getElementById("set-title").addEventListener("click", () => {
  const title = document.getElementById("title-text-input").value;

  chrome.action.setTitle({ title });

  showActionTitle();
});

async function showActionTitle() {
  let title = await chrome.action.getTitle({});

  document.getElementById("current-title").innerText = title;
}
下面我们来看一下代码效果
首先演示禁用和启用 action 以及切换 popup 实例的例子:
可以看到当我们的 action 禁用之后,再次点击 action 就不会起作用,非常适合用来做插件权限的管理,比如说当识别到某些非法用户的时候,就禁用插件的控制台。
此外还可以切换 popup 的实例,也可以用来做权限控制,当识别到特别的用户时,给出特别的 popup 去操作。
下面来看一下设置 badge 相关的操作: 
这个还是比较简单的,可以用作插件工作流程中状态的提示和流转,最后来看一下图标的动态设置:
动态的图标设置倒是用的不多,因为图标本就是一个插件的标示,不太会有业务场景需要换这个图标的,但是 chrome 依旧为我们提供了这个样的能力。
四、最后的话
本文主要演示的插件 action 相关的操作,我把相关的资源放在了 git 的仓库里,最后能够 down 下来在本地查看一下,会更加的直观和理解,仓库地址是这个